
We're so used to creating notes, photos and memos on our phone, we get used to always finding them there at the tap of an icon. One day your work is there, the next it's gone. You lose ideas and valuable information that could come in really handy in a week or two.
Reincubate builds software that goes well beyond iCloud backup's capabilities, in the sense that you'll have the ability to browse through numerous backups made over time, preview your files, and recover what's needed. It's just like a history of everything you created with your iPhone, all in your hands.
Let's walk you through using iPhone Backup Extractor, to recover all your Notes and deleted Notes from your iTunes or iCloud backup. Not sure if you have a backup downloaded on your computer? You can find all iTunes backups stored on your PC or Mac, by going to iTunes → Edit
(from top menu) → Preferences → Devices tab.
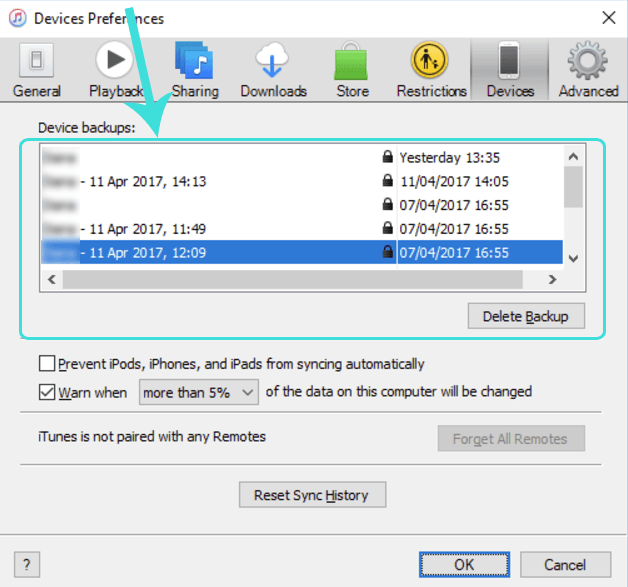
Find backups saved on PC or Mac
Above you can see the available iTunes backups and the date when they were created.
As long as your Notes have been backed up, you can recover all your data by following these simple steps:
- Download and install the free edition of iPhone Backup Extractor.
The free edition is limited to extracting only four files at a time. That's OK for most users, though if you want to get them all back at once, you might want to register. - Extract your Notes
Once you've installed iPhone Backup Extractor, it will automatically look for iTunes backups located in your default backup folder.
If you want to recover your Notes from an iCloud backup you should first tell iPhone Backup Extractor about your iCloud account, by clicking on the+button, or on the "Click here to add an iCloud account" text. Other than doing that, getting Notes from an iCloud backup works in exactly the same way. ?
If you have multiple backups, you should select the one that contains your Notes, from the left window of the iPhone Backup Extractor.
To retrieve your lost Notes, look in the "Overview" section and click on the Notes icon.
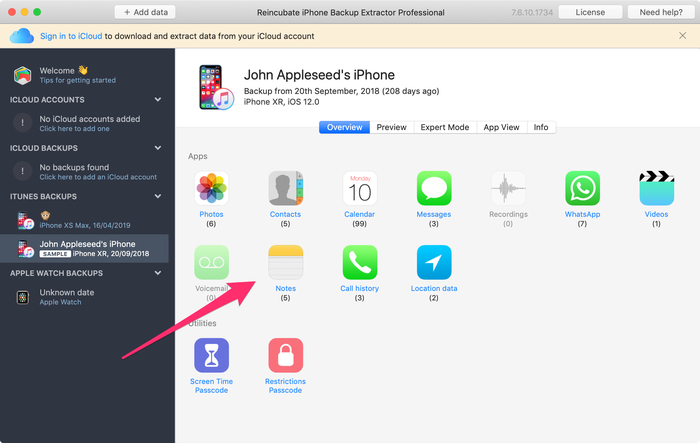
Extract Notes with iPhone Backup Extractor with one click
Choose the destination folder where you want to extract your data and then click "OK". iPhone Backup Extractor will recover all your Notes (including the deleted ones) from your iTunes or iCloud backup.
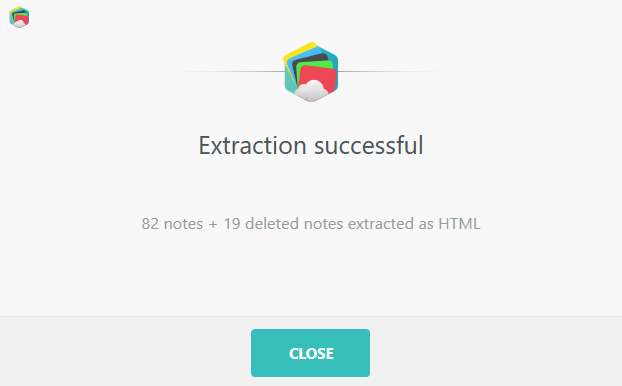
Succesfully extracted Notes!
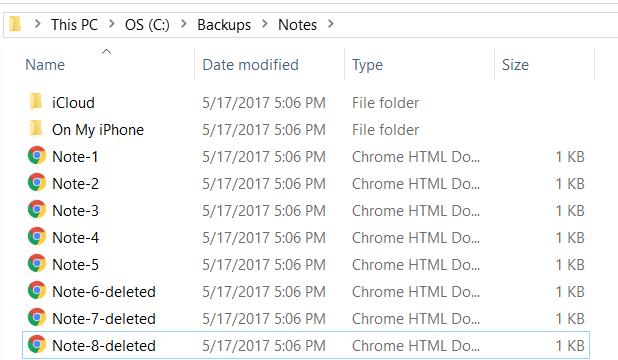
That's how easy and quick you can get back all your Notes and attachments. Now browse the folder where you've extracted your Notes, and find your valuable data.
You should be able to see all notes including the deleted ones.
Viewing a Note extracted from an iTunes backup
This method is also useful when:
- You want to download your Notes on your computer or if you need to retrieve the files attached to your Notes
- You want to extract your Notes from devices with two-factor authentication enabled (Hint: it's built into iPhone Backup Extractor, nothing extra is needed.)
- You need to extract your Notes from encrypted iTunes backups
- You want to get your Notes from the iCloud even you have no access to your iPhone
- You want to recover your Notes from any iOS version including the latest (we've supported them all)
Recovering Notes before they're purged
There's another approach that can be helpful when looking to recover Notes from an iOS device. When a note is deleted, it'll be moved to the "Recently Deleted" folder within the Notes app for 30 days, before it gets permanently deleted. You can find and recover these Notes like so:
- Tap "Back" in the Notes app to see the list of all folders
- Tap on the "Recently Deleted" folder to see it
- To recover a Note from the deleted list, tap "Edit" in the top-right...
- ...then tap the Note to select it...
- ...and tap "Move To" in the bottom right. This'll let you move the deleted Note back into a regular folder: and undelete it.
Have you had any issues recovering your iPhone, iPod or iPad's Notes? Let us know in the comments below.